So yesterday the Kicksarter Campaign for the Craftalight ended with only 43% funded. What a pity! But that’s life!
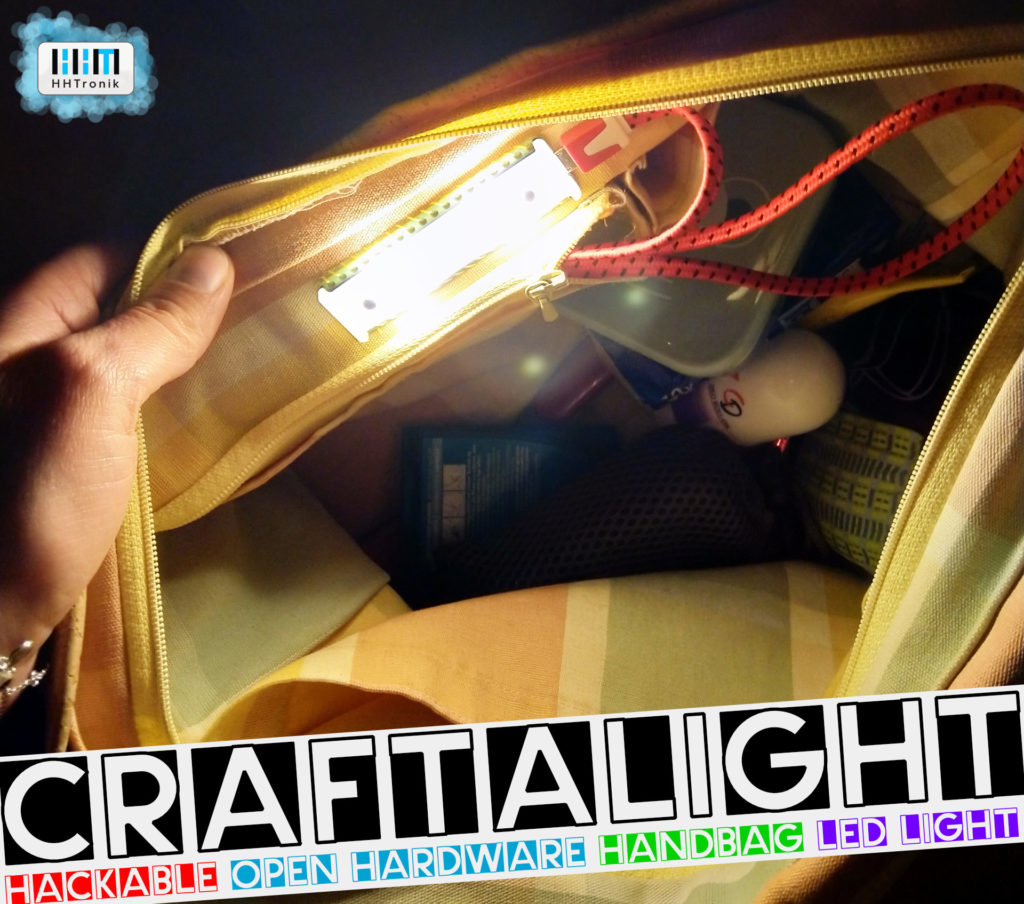
The Craftalight – sewn in a handbag, light up.
Nevertheless we want to thank you all who belive in the Craftalight and supported us. We had a very hard time to spread the word as most media wanted a lots of money for publishing a little post. If we have had the money for a huge media campaign we would not have made a Kicksarter. So special thanks to heise online / Make: germany, for the shootout! Also thanks to electronics-lab for the great article.
Good news for your bags
Open sourcing
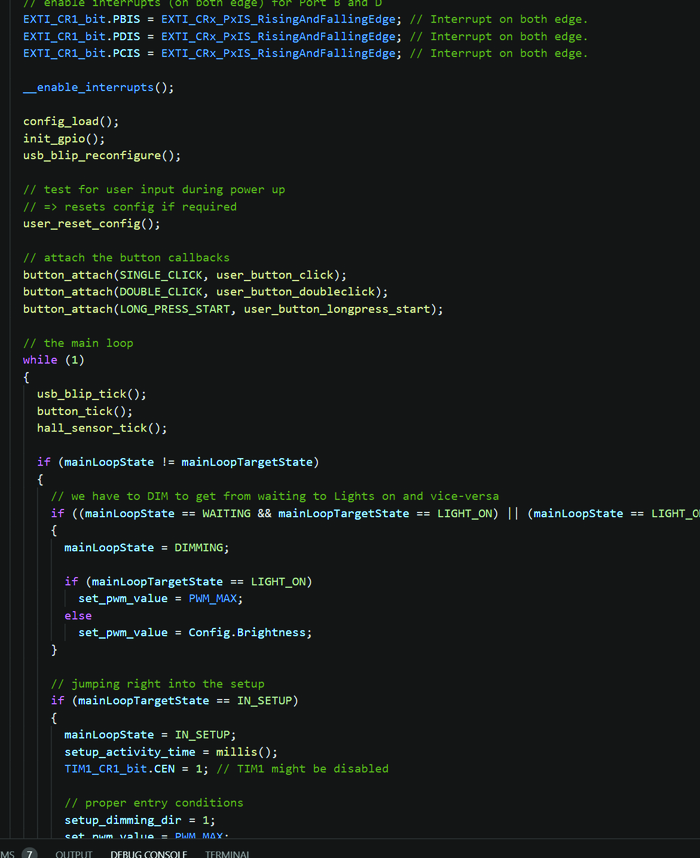
The firmware of the Craftalight is already available on GitHub.
The fact that the Craftalight is already fully developed we want to fullfill our promise about open-sourcing the whole of the Craftalight anyway. It’s taking us a few more days to properly package all of the ECAD files (including the footprints etc).
Even more good news
Advertising
And that’s not it; for everyone intersted in getting a Craftalight, we are preparing a small production run of 20 to 50 units. If you want one, head over to HHTronik.com ASAP (there’s a small discount until end of the month of February). We had to increase the price a little bit because of the reduced quantities (especially the threaded inserts are CRAZY expensive versus what is possible when ordering a few more of them). On the other hand, there is more choice regarding shipping options and with the proper handling of the VAT calculation in our shop non-EU-customers get a 19% “discount” ;)
Btw: We’ll be back on Kickstarter with something totally different soon! If you’d like to sit in the first row, go over to our website and subscribe to the Newsletter, we promise to not spam you!
P.S.: please share the word with friends, handbag addicts you think might be interested and fellow hackers to make this happen :)
Yannic and myself were walking home one warm summer night, realizing that it is really hard to find stuff in Timelord-technology-equipped handbags (you know, those bigger on the inside :D) especially when it is dark. We were simply discussing that it’s sometimes difficult to find small things in one’s handbag/backpack and decided to hack a solution to test – the Craftalight was born. Now, approximately half a year later we figured that Kickstarter’s MAKE 100 was the perfect time to share that small solution with the world. We already gained some experience on Kicksarter with our first project the PGCSU.
Who’s the Craftalight for?
You tell us ;) the “out-of-the-box experience” requires only basic sewing skills: you sew it (and the magnet) in your hand-bag and hook it to a power bank. Voilà, you’re pretty much done. Enjoy your brightened-up accessories. For those with no sewing skills you can also use velcro to attach it to your bag.
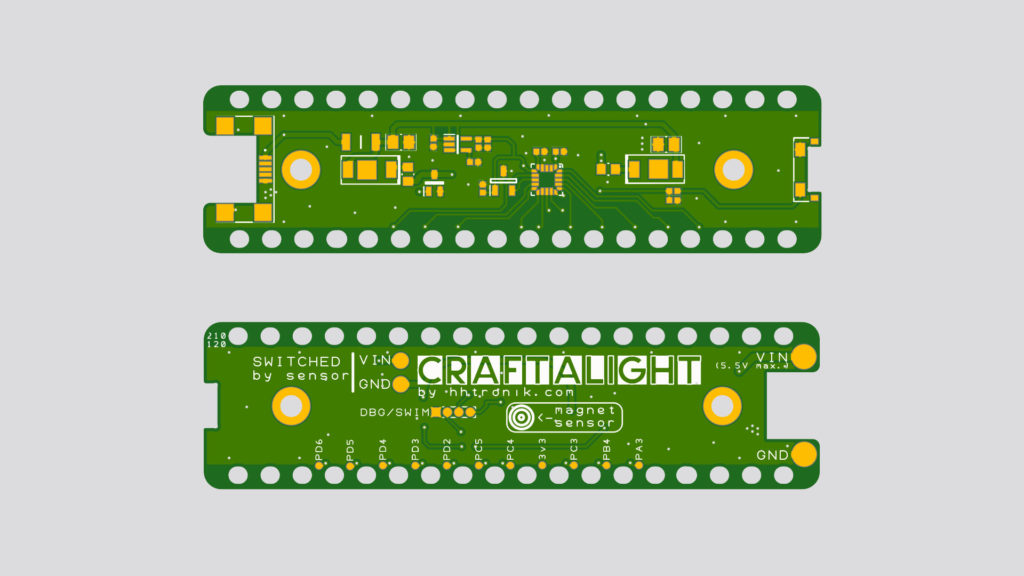
break out pins
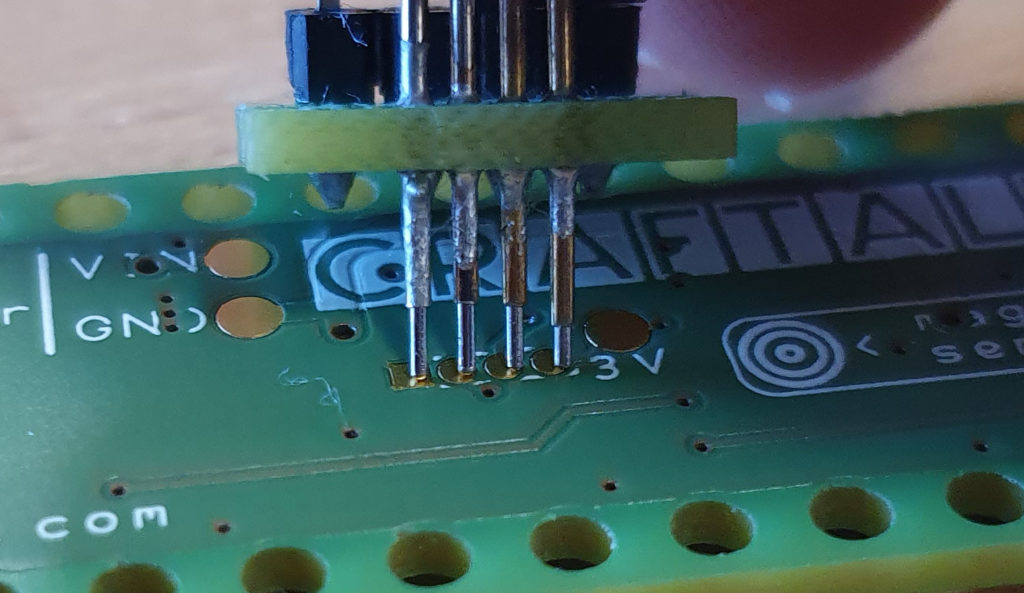
But that’s not it: we want you to be able to customize the Craftalight, which is why we will provide full sources (schematics, mechanical drawings, source code etc). Additionally we have broken out the unused pins to pads on the back side of the PCB.
Finally, for easier mods that don’t require software changes, we added a switched power pad to which you can simply attach any device you want. When the Craftalight switches on, you can draw as much as 500mA from that pad (at the voltage supplied by your power source).
How does the Craftalight work?
The Craftalight is based on a STM8 value-line microcontroller and a Hall-Effect sensor. The Hall-Effect sensor senses the presence of magnetic fields which enables it to detect the presence of a magnet.
How it works
This allows you to make the Craftalight switch on or off using a magnet on the lid of the purse or bag. To allow different setups you can configure whether the Craftalight should switch on in presence or absence of the magnet.
Furthermore to power the Craftalight, you can either use a USB power bank (thar most people already carry in thier bags) or provide 3.3 to 5.5V on two pads on the PCB directly.
Features
Hackable: open source hardware and firmware
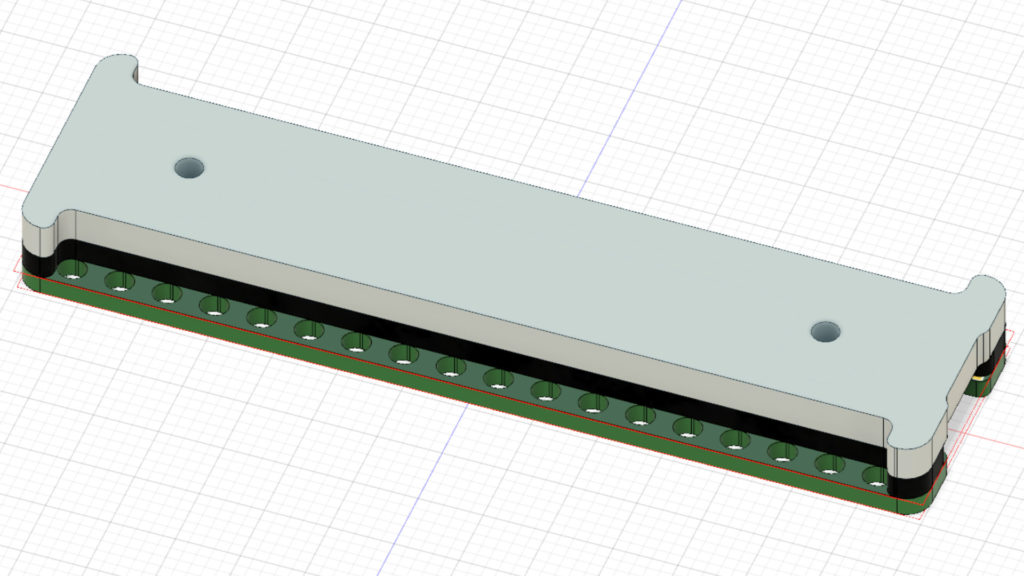
Small and light: 70x20x6.5mm and ~10g
Available with white and black PCB solder mask
Adjustable brightness
Warm white LEDs (3200K) under a frosted acrylic diffusor window
Hall-Effect switch to detect when the purse is opened
High quality and low stress design components
EPDM rubber seal to prevent dust accumulating between the PCB and the acrylic diffusor
Sew-able using the holes in the PCB
Includes a strong, sew-able magnet
for you to tinker: most unused micro-controller pins broken out to soldering pads
NEW: power-bank “blip” function for improved compatibility!
What else can I do with it?
Off the top of our heads you could:
use it to light a drawer or a cabinet (stick the magnet to the front panel or door)
put it in your glove-box
add it to your suitcase
use it as a STM8 micro-controller breakout board with white LEDs, low power LDO and Hall-Effect sensor
and may other usecases, too. Just be creative!
pcb rendering
Let’s talk about technology
The microcontroller and programming
The micro we use is an STM8S003 series controller. (because it’s cheap, good, widely used and we know and like it)
We gave Visual Studio Code with the Platform.io plugin a shot. It worked rather well and its free, so this is what we will ship for. The compiler being SDCC (Small Device C Compiler) the programming language is SDCC-flavored C. We didn’t use any fancy library, RTOS etc… because the application is rather simple.
As an substiute you could try SDuino, the SDCC integration for STM8 in the Arduino IDE. Alternatively – for a fully fledged debugging experience – you may want to try IAR’s Embedded Workbench for STM8 (they offer a free version). Some code rework may me required when switching compilers.
Moreover, you’ll need a SWIM-compatible programming adapter (for examples an ST-Link v2). If you don’t own one yet, have a look at the rewards in the Kicksarter Campaign.
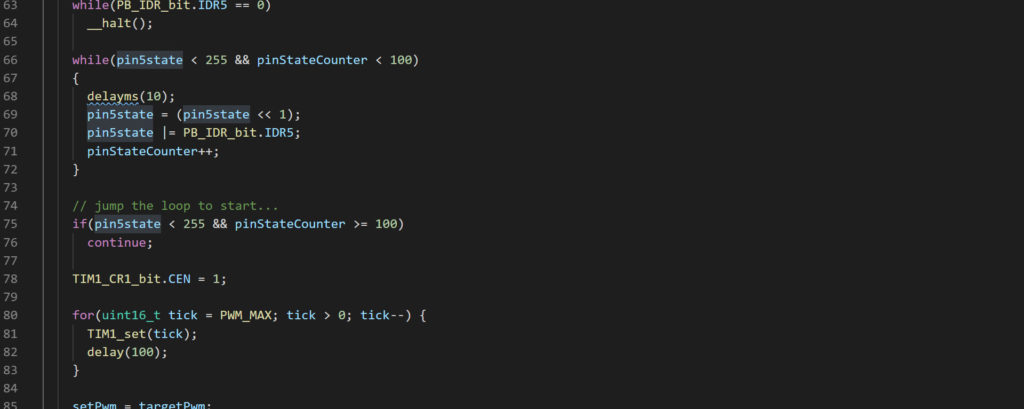
Code
Lightning and power consumption
The LEDs are rated for 150mA at 3V. On the Craftalight we drive them with 110mA max. This ensures they don’t heat up much which is beneficial to their life-time while they’re still super bright. The LEDs are switched by a single N-Channel MOSFET which is driven by the micro-controller.
MOreover you can dim the LEDs by using PWM (at about 40kHz).
Full on the current consuption is at about 230mA and in the off state the Craftalight draws just around 60uA .
What about the magnet?
In addition, the magnet should not demagnetize / damage my credit card magnet strip, unless you hold the card directly on the magnet for a long period of time. This is because the credit cards (and most other magnet strip cards that are not meant to be re-written often) use high coercivity strips which require powerful magnetic fields to change. As long as your cards stay approx. 2cm / 1 inch away from the magnet they should be a safe.
Alltogether, in our opinion the Craftalight is a super cool gadget for your bags. Me personally I find it very usefull, epecially when I want to find the keys in my handbag. If it’s useful or only a “nice to have ” it’s up to you to decide!
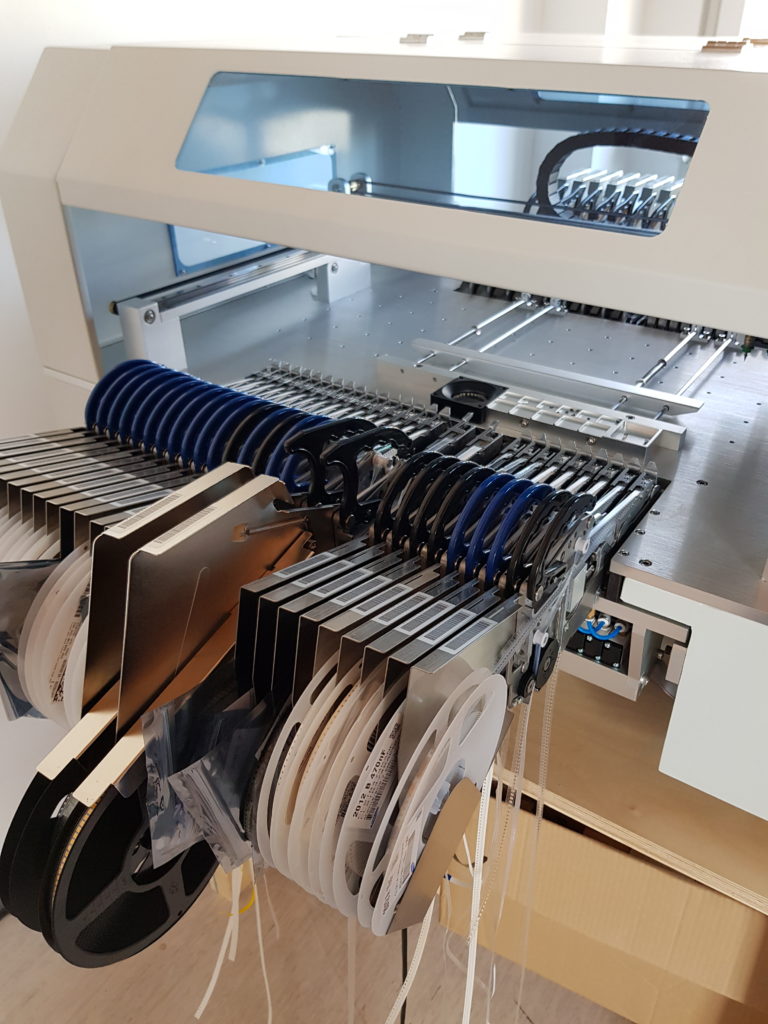
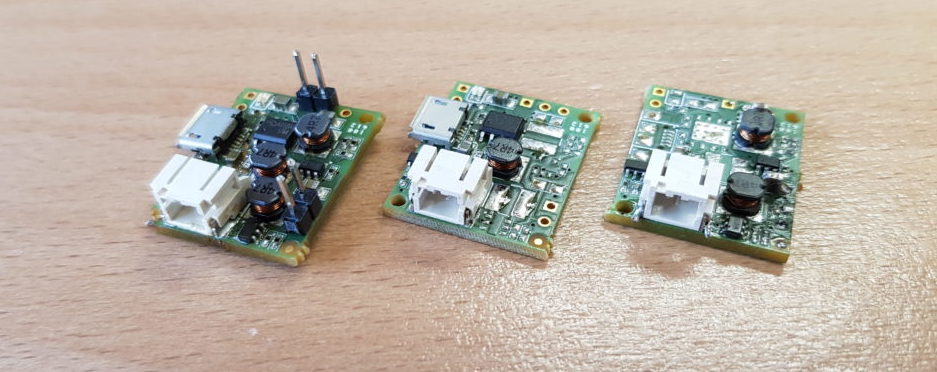
Among the many things we did in 2018 was founding our company “Staudt Technologies GmbH” to manufacture and market our first ever product called Luccia. Luccia is a wireless nightlight type product with motion sensors and a nice design. But that’s not what this post is about: while setting up our manufacturing we bought this nice pick and place machine:
As neither of us ever had a hands-on experience of any sort with this kind of equipment, we decided to spin a test-run board using mostly cheaper components in the same footprints that we were to use later on.
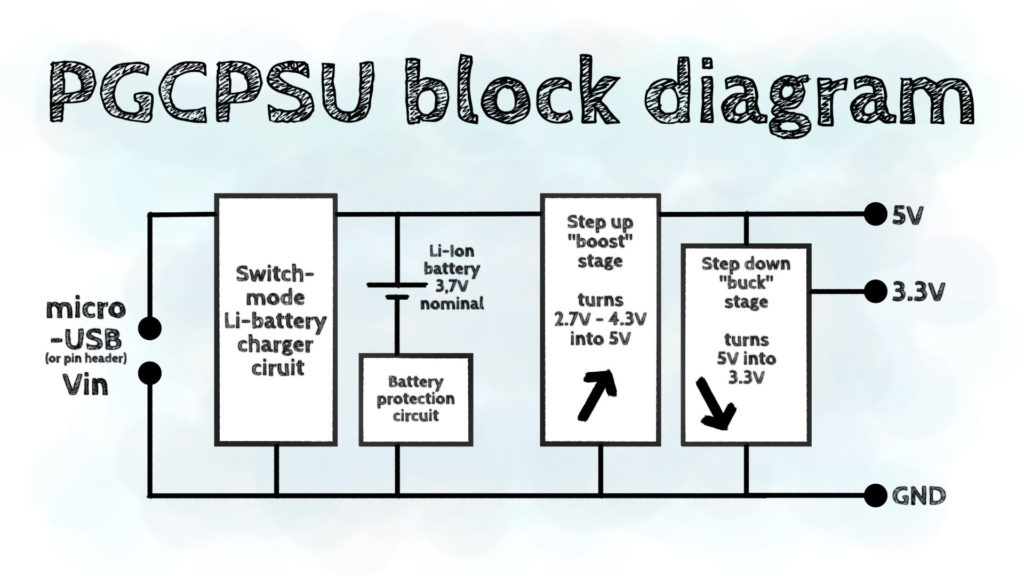
Reusing power supply sections out of previous projects we ended up with a 5x5cm board having a three switch mode converters on it:
a buck stage lithium battery charger
a boost stage to provide a 5V rail
…on which another buck stage is attached to deliver 3.3V
Out of ten PCBs we had to cut our teeth on the machine, seven were “bin grade” half-populated messes, but the three remaining ones were actually usable. Even surprisingly good from a technical perspective.
As the PCB we had to populate for Luccia had a higher density, we re-spun the PGCPSU in its second revision, shrunken down to just 25x20mm. And it still was great.
The three sole survivors of the first PGCPSU “batch” ever. From the left to the right: one fully populated one with some mods, one charger only populated board, and an boost + buck stage only one
Some technical insight
All three switch mode stages employ my favourite SMPS technique of recent years: synchronous conversion. This means that instead of having a Schottky diode somewhere in the circuit, the same IC integrates a pair of back-to-back MOSFETs forming an “ideal diode” circuit which is driven “in sync” with the power switch.
This is great because it eliminates the forward voltage drop of the diode allowing higher efficiency at low loads. For the PGCPSU it has the bonus points of having fewer components to fit on the tiny board.
The projects the power supply stage circuits came from were rather low power, maxing out at roughly 100mA each, which is why the PGCPSU is highly efficient below that range. On the other hand the “sacrifice” was a rather low maximum load capability
So, “Kickstarter” I said.
While I didn’t design the PGCPSU to sell it, I planed ahead for that opportunity while preparing the second iteration. I brainstormed for a crappy name, added the “by hhtronik.com” (we have big plans for that “brand” actually) on the silkscreen, as well as some indications for the in- and outputs.
Of the nine boards I build in the first real PGCPSU “batch”, five were actually usable in the end (read: complete and not heavily modded for testing purposes). These actually underwent real-life testing in a number of “hacking DIY projects” by family members or myself.
We put it in DIY home automation WiFi sensors (soil moisture, temperature). We attached it to anything we needed power on the go. Arduinos, Raspberry PIs (Zero W), Bluepill boards etc. And it performed great. As
What happened then
Fast forward March 2019, I finally found some time to write up the campaign, make some fancy charts and some comparative benchmarking.
On April 3rd the campaign went live. And within hours the first 10 pledges were in: Oo Then, just four days into the campaign we hit the (lowly) funding goal of 1250€.
The most amazing experience about all of this has been the super nice response of big blogs like CNX-Software and Geeky-gadgets who listed the campaign super quickly (like in “sub-1h-quickly”), which is really amazing!
Hello everyone, it’s been a long time since we last wrote. Actually it’s been a super busy time for Katharina and me, with sooooo many things happening. Between getting married, becoming parents, health drama on my side and thousands of projects we didn’t simply find any time to post here. Even if there was so much stuff we could have posted about. Sorry for that.
While we won’t be able to catch up the “lost” time and cover everything we did since then, we’ll try hard to post more often again!
Lately I’ve been posting a bit over on Instagram. As it takes a lot less time to just throw an image there there’s much chance you’ll get small updates there more frequently, so don’t forget to subscribe: @embedaddy
Yesterday I showed you my last Christmas present. Now it’s time to show you what I made for me to wear at Christmas. It’s a pretty dress which I saw in the November Burda issue. You can find the pattern as a single pattern here (in German) and here (in English). Continue reading
And there we are. Both of us sitting in front of the screen, thinking of what we can write down here. So much stuff, and no clue of how to start…
Both of us have big plans for this blog, even just listing the possible topics would probably exceed the scope of this post, so here just a short listing (be prepared for maaany things outside of this preview!):
Handcrafting
Cooking
Electronic DIY
Programming
We really hope that we’ll get a nice pace of fresh posts around here. Don’t put to high expectations on us, as it’s our first “real” blog. Our hope is that this strange mix of topics will result in Knitters and Sew-addicts learning some fancy electronic stuff (and vice-versa!). For our part we’ve learned that those worlds really get along very well. Our home is a great example; most of our equipement is somehow hacked, crafted or modified to suit our needs.
Here just a very small selection of what we’ve done within the past two years:
Death by Chocolate!
An old entry door turned into a fancy wardrobe
Birdie blouse
Summer dress made of jersey
Take an arduino, an FM receiver and an amp
Yummy!
Xmas decoration
Freshly restaurated!
During rebuilding
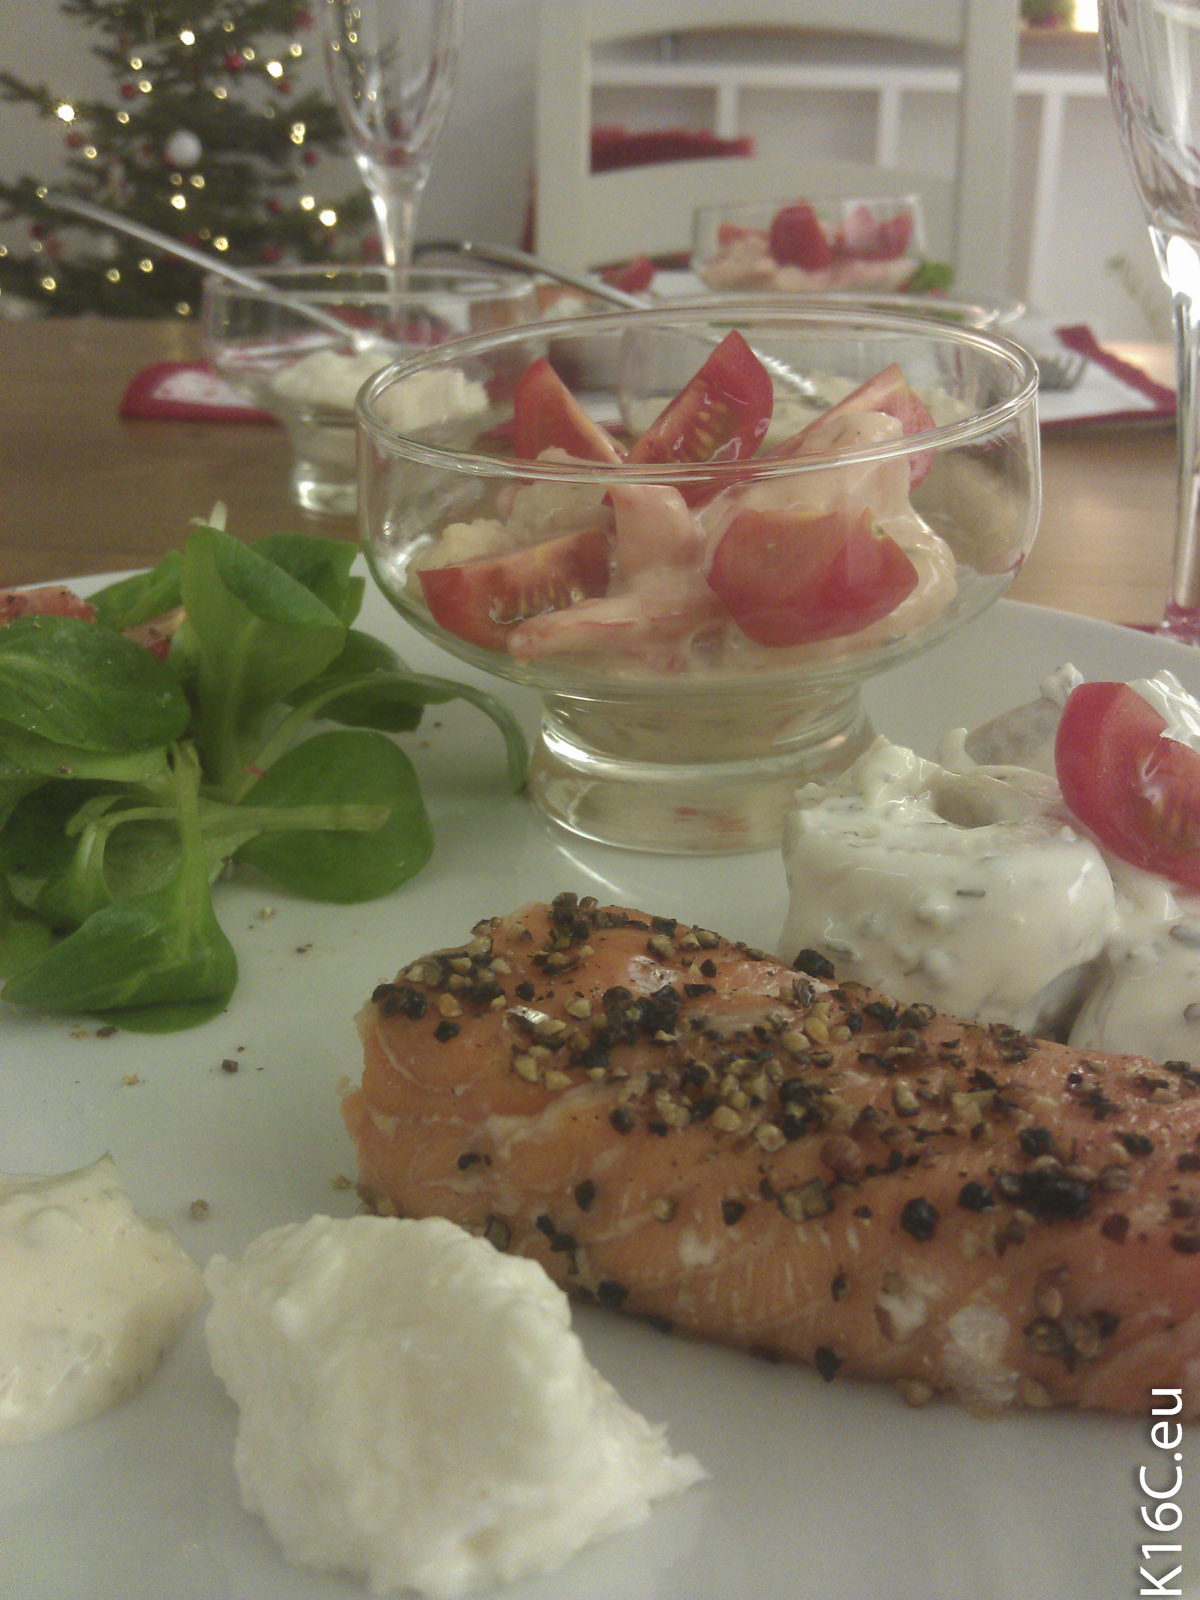
New years eve dinner
Enought for now. We hope that you’ll check our small corner of the WWW from time to time. We’ll do our best to keep it clean and up to date!
– Katharina & Yannic
Proudly powered by Wordpress. Theme: flat by Yoarts